Custom audiences
You can create a custom audience for a Compatibility Test if you are looking to test with specific assistive technologies, device types, operating systems and/or browsers. The two default audiences available to you are:
- Mixed users (three screen readers, one screen magnifier and one alternative navigation user)
- Screen readers users (five screen reader users)
How to set up custom audiences
You can set up a custom audience either from your account settings or while creating a Compatibility Test.
From settings:
- In the main navigation, select your name to open the dropdown menu.
- Choose Settings from the menu.
- Select Custom audiences and then click Create audience.
From a Compatibility Test:
- Select New Request.
- Choose the Request type Compatibility Test, assign it to a project, and click Next.
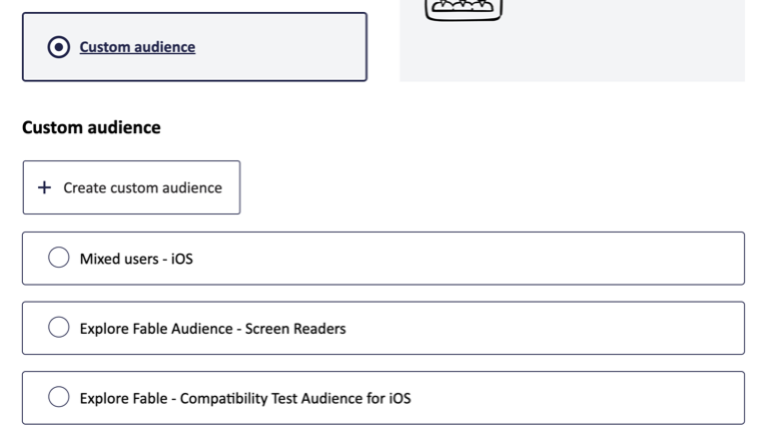
- Under Audience, select the Custom audience option.
- Select Create custom audience.
How to add a custom audience to a Compatibility Test
Once you’ve created your custom audience then you can add it to your Compatibility Test.
Steps to add a custom audience:
- Select New Request.
- Choose the Request type Compatibility Test, assign it to a project, and click Next.
- Under Audience, select the Custom audience option.
- Select your custom audience from the list.
Tips for creating a custom audience
Use a descriptive name
Choose a name that clearly reflects the purpose of your audience. For example:
- “VoiceOver on iOS”
- “Screen Reader Compatibility: NVDA + Chrome”
- “Mobile Browser Testing: Safari + Android”
A clear name will make it easier to identify and reuse the audience across projects.
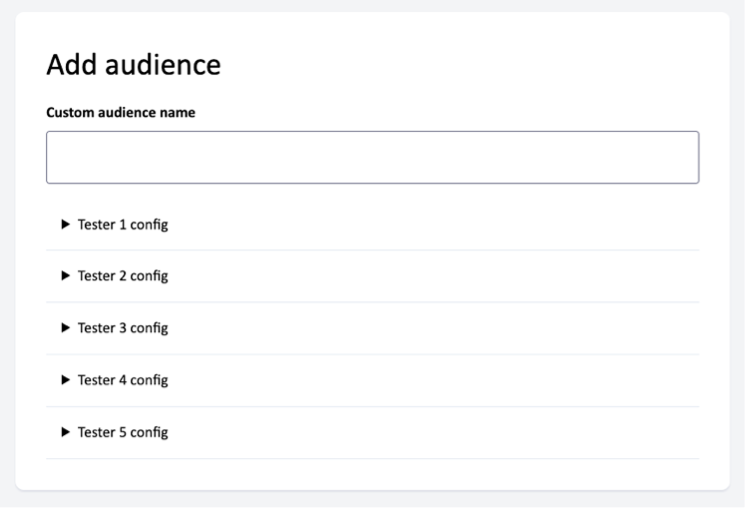
Tester customization
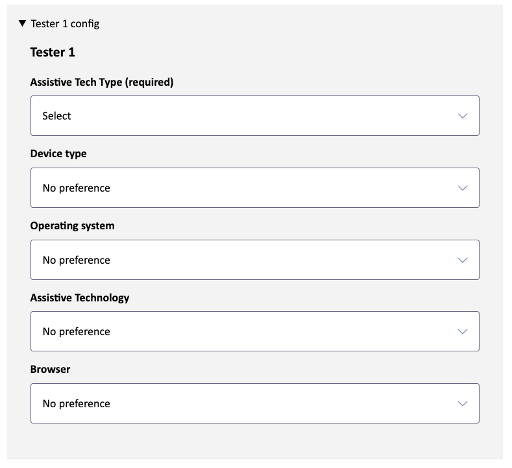
Each tester in your custom audience can be configured with the following attributes:
- Assistive Tech Type: Specify screen readers, magnification tools, or other assistive devices. This is the only required attribute.
- Device Type: Choose between mobile devices, laptops and desktops.
- Operating System: Specify platforms like Windows, macOS, iOS, or Android.
- Assistive Technology: Add even more customization to the assistive technology by selecting the specific technology type.
- For example, if you want to test with a user who gives voice commands and a user who uses a switch system to check for barriers for both types of alternative navigation, you can do that here.
- Browser: Combine browser-specific testing with assistive technology to test compatibility (e.g., NVDA with Firefox or JAWS with Edge).
- Be careful about which combinations you choose as they might expose assistive technology compatibility issues rather than accessibility barriers. For example, VoiceOver works best with Safari.
Support and troubleshooting
If you have any questions about setting up recurring requests or are facing any issues, email support@makeitfable.com.