Jira integration
By integrating Jira with Fable, Jira issues can be created from clips or from Compatibility Test results. The details of the accessibility issues will be in the description of the Jira ticket, along with a link back to the shared page for anyone to view the issue or clip.
How it works
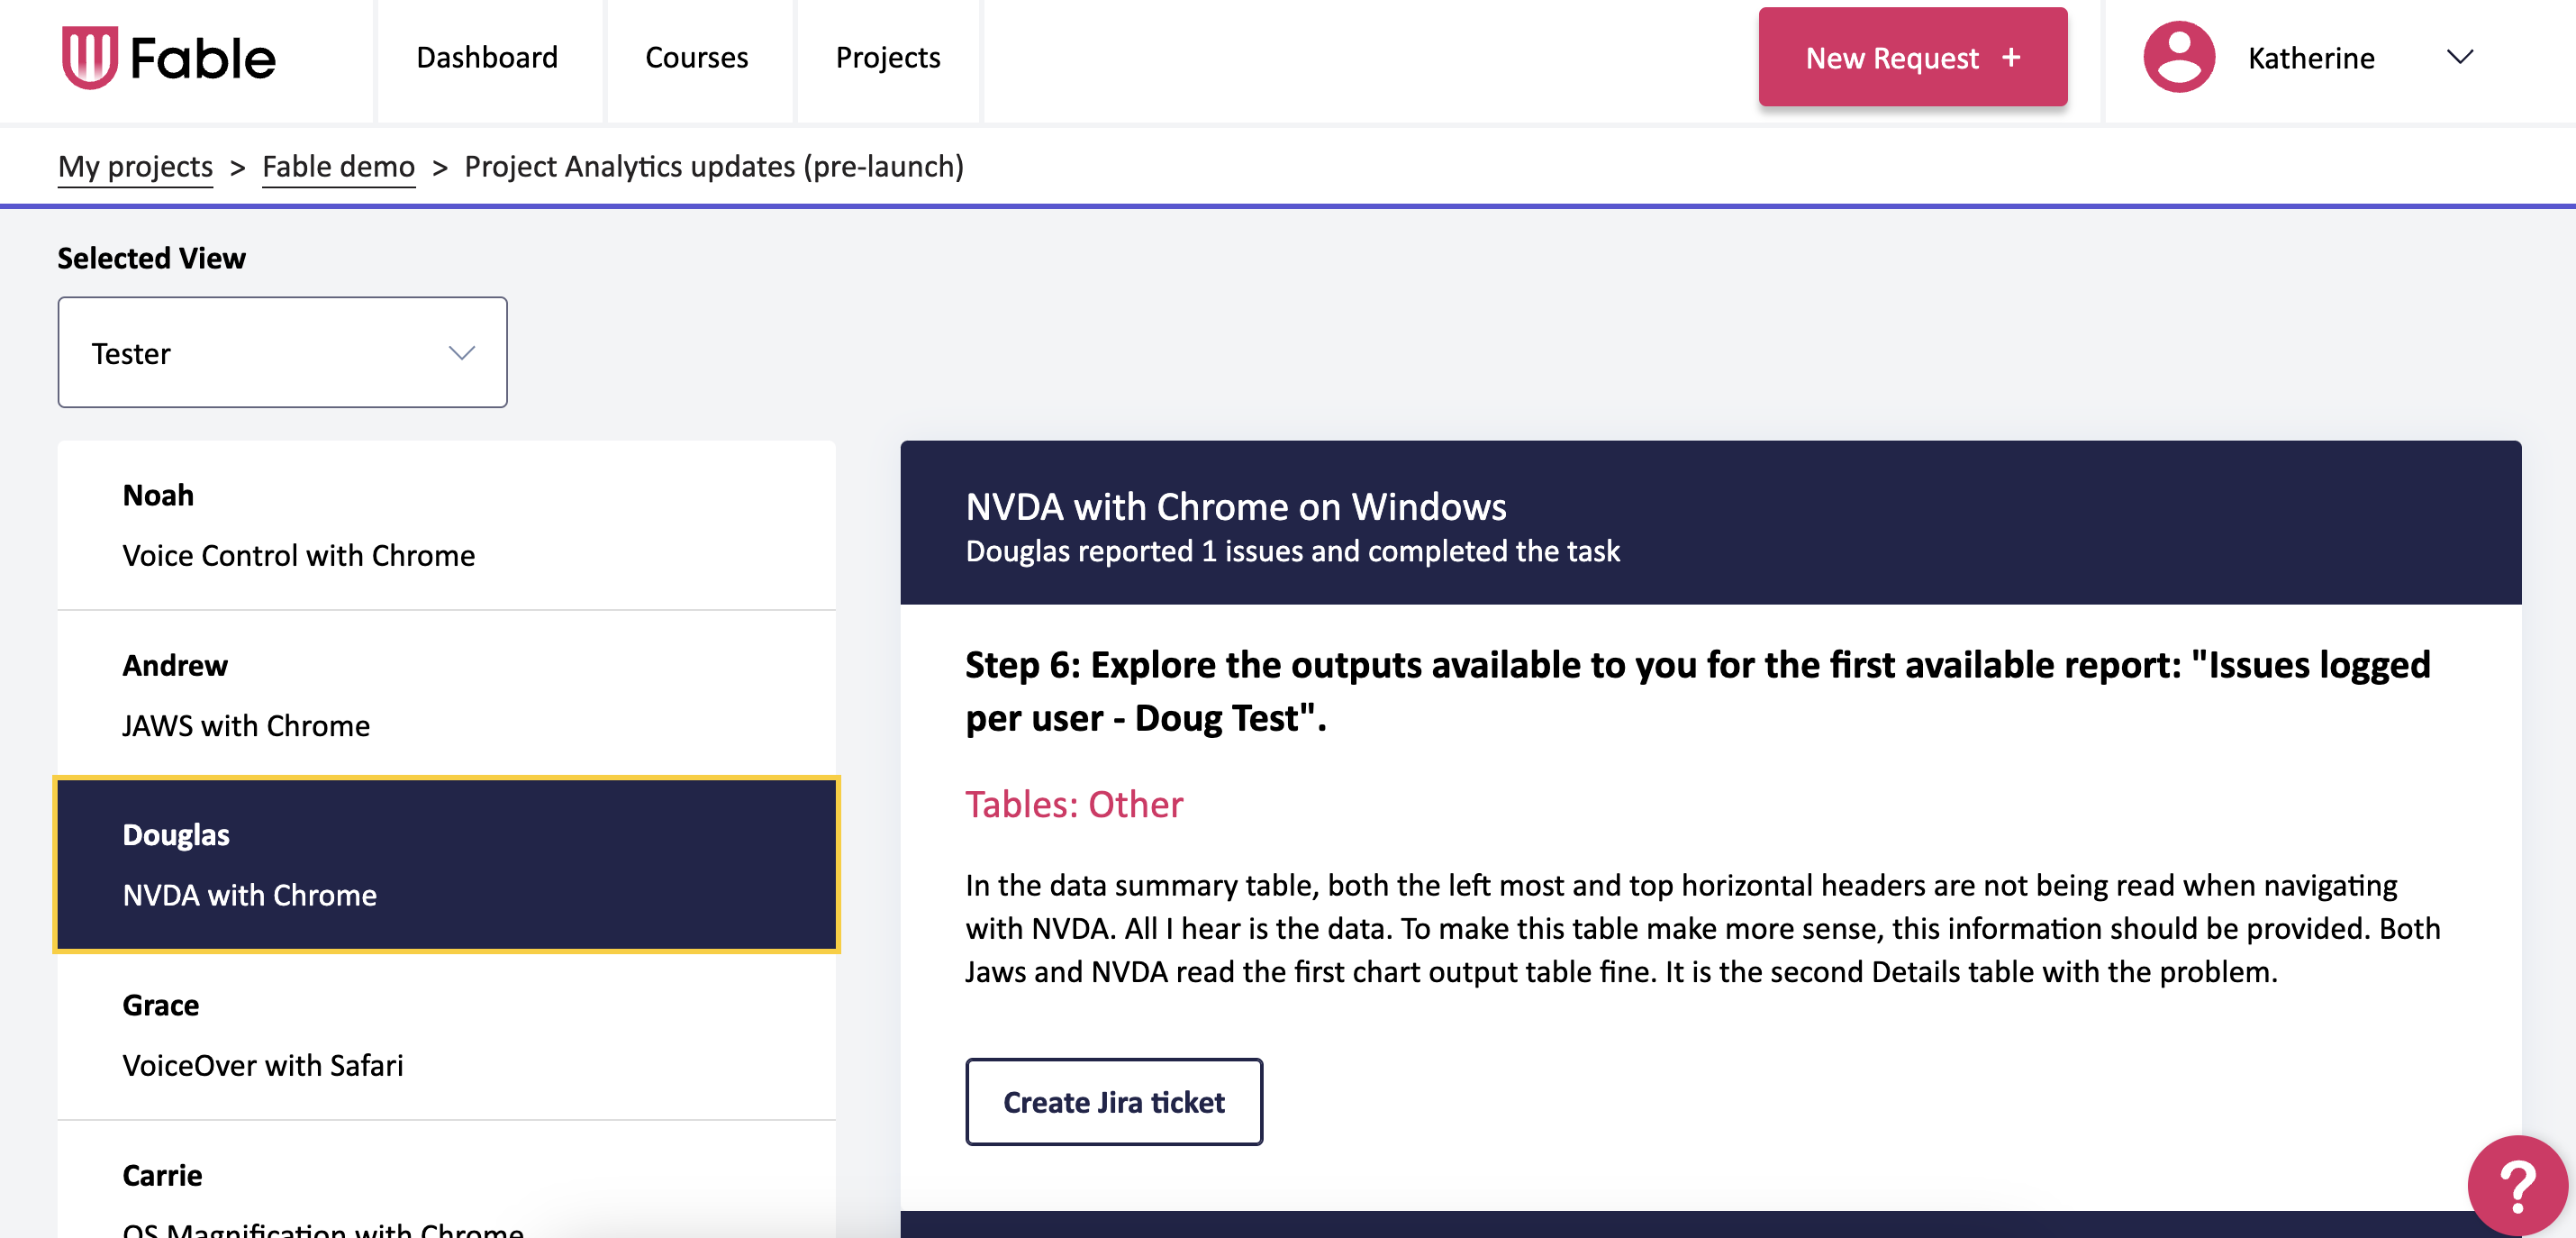
Once the integration is set up, users will have the option to create Jira tickets from Compatibility Test results. When viewing the documented issues at the bottom of the results page, there will be an action labeled “Create Jira ticket” for each issue. Once selected, you will be prompted to select the required Jira information, and then a ticket will be created.
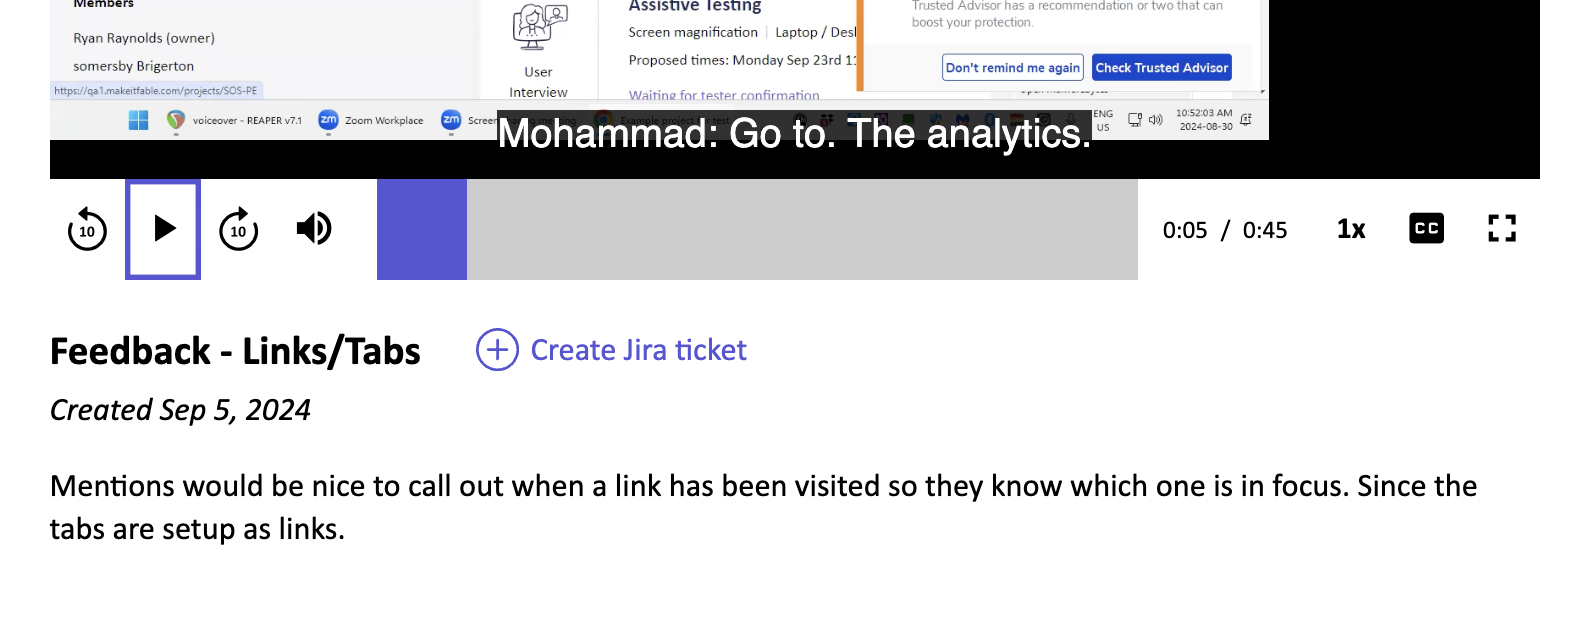
For clips, there will be an action labeled “Create Jira ticket” when viewing the clip. Once selected, you will be prompted to select the required Jira information, and then the ticket will be created for you.
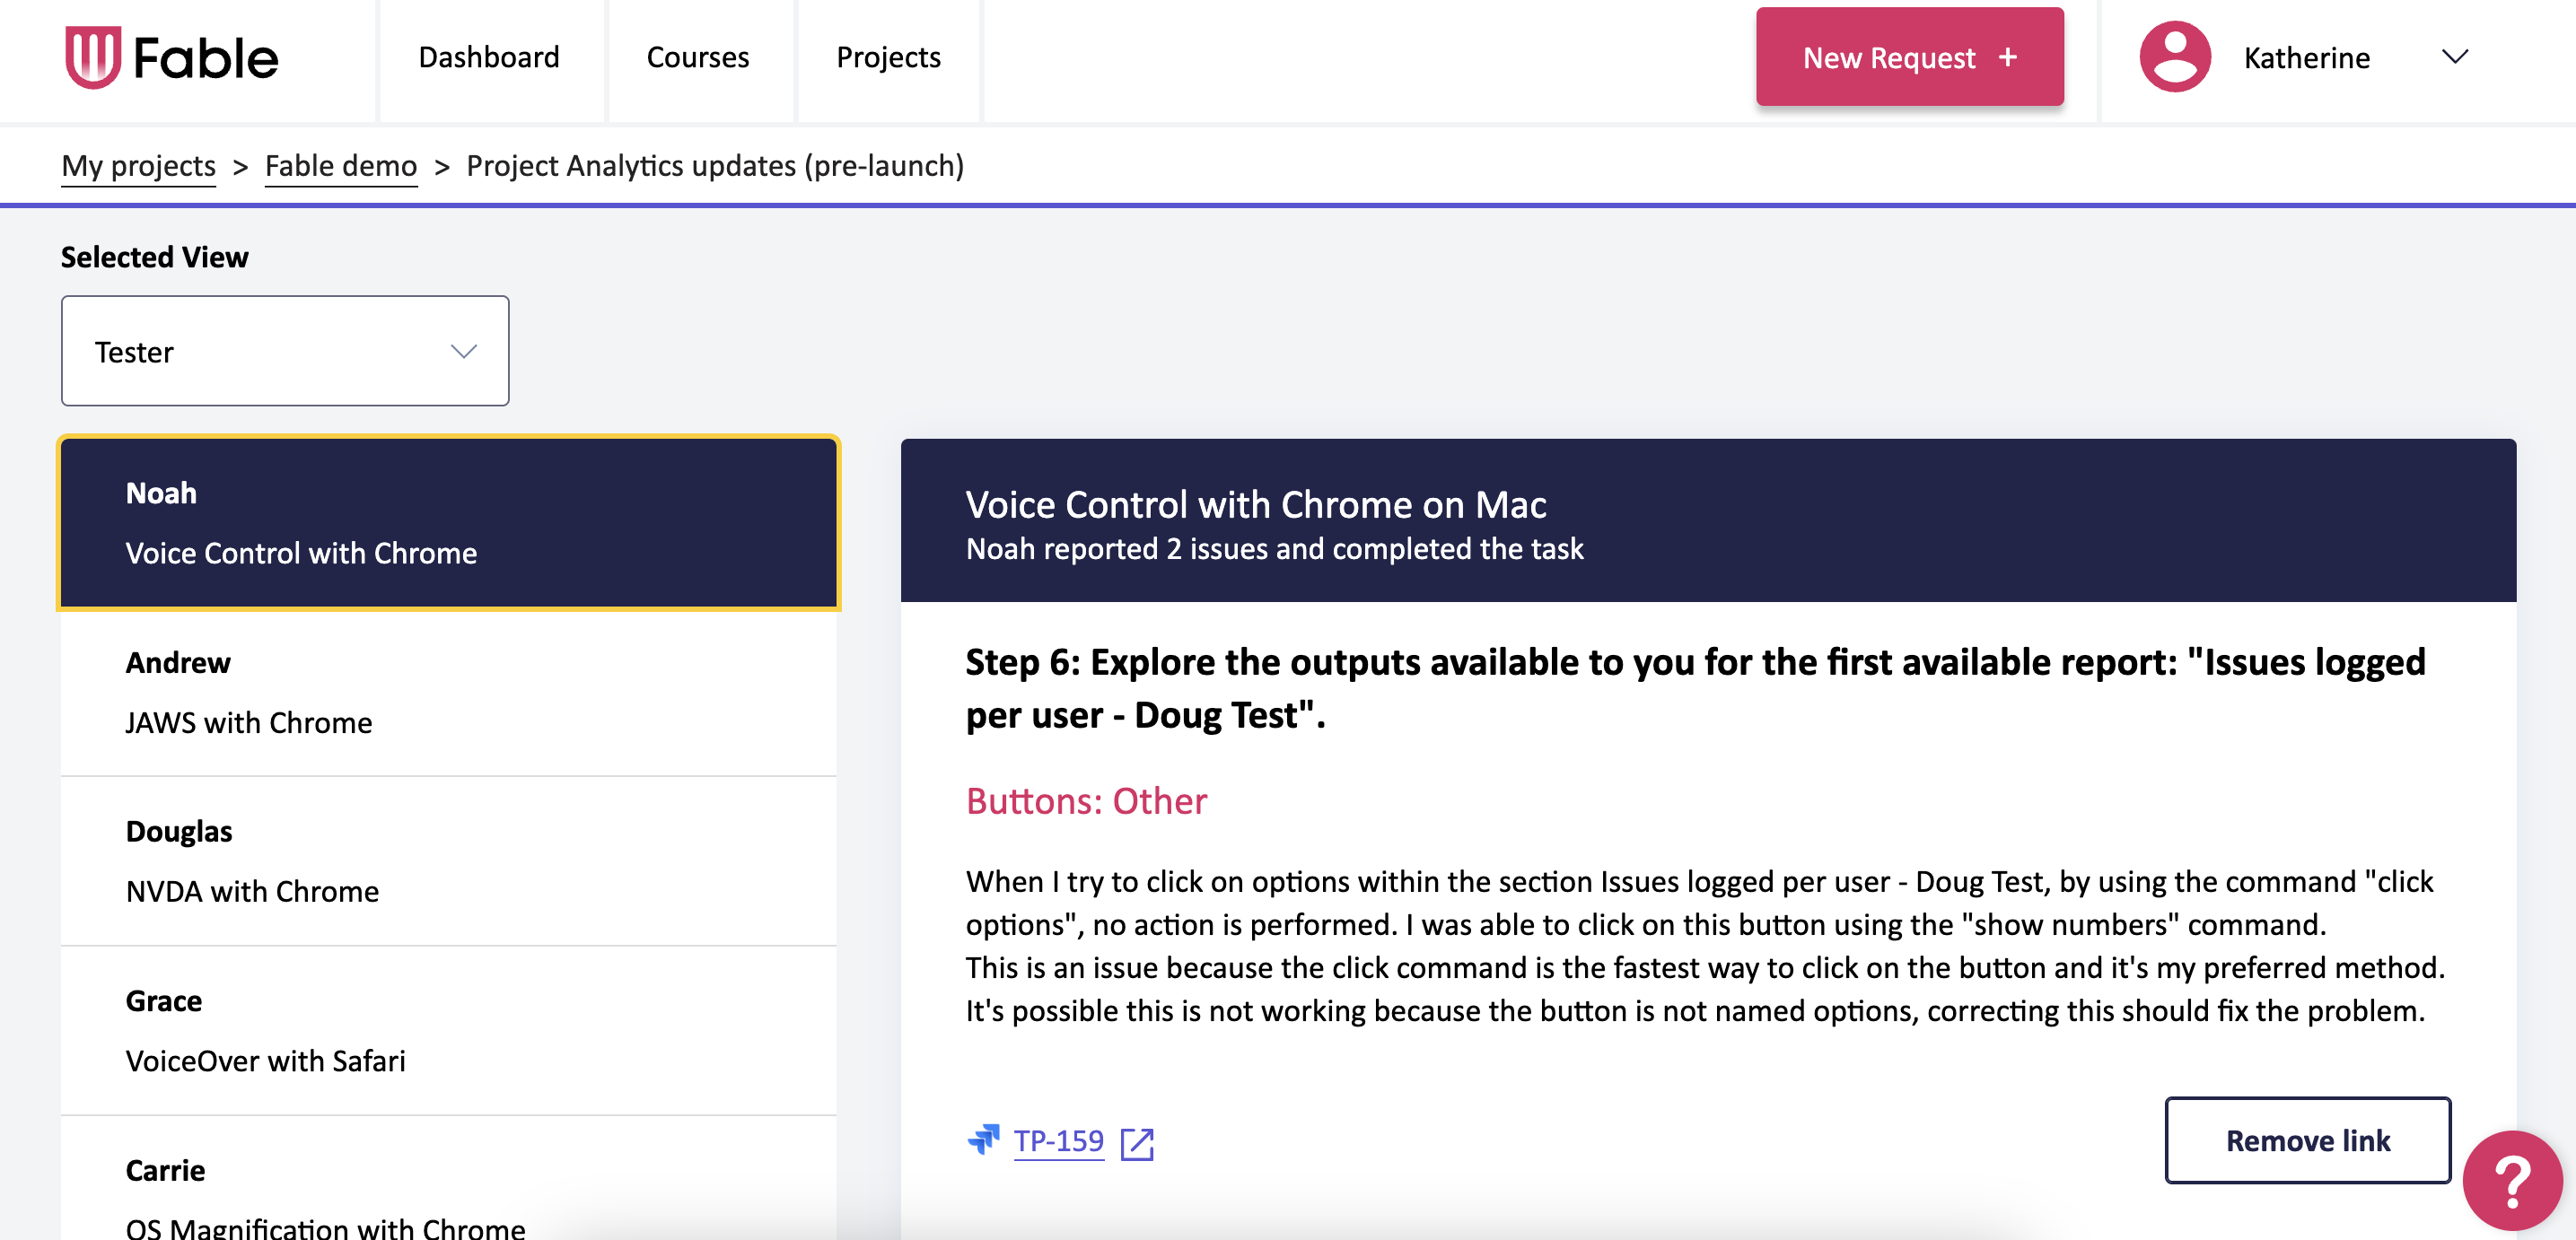
Once the ticket is created, it will be associated with that specific clip or Compatibility Test issue with a link to the Jira ticket. If a ticket was created in error or is no longer needed, the ticket can be unlinked by selecting “Remove link”. Note: if you want to delete the Jira ticket completely, you must do so directly within Jira. Any linked Jira tickets will also be included in the Word and Excel reports for Compatibility Tests.

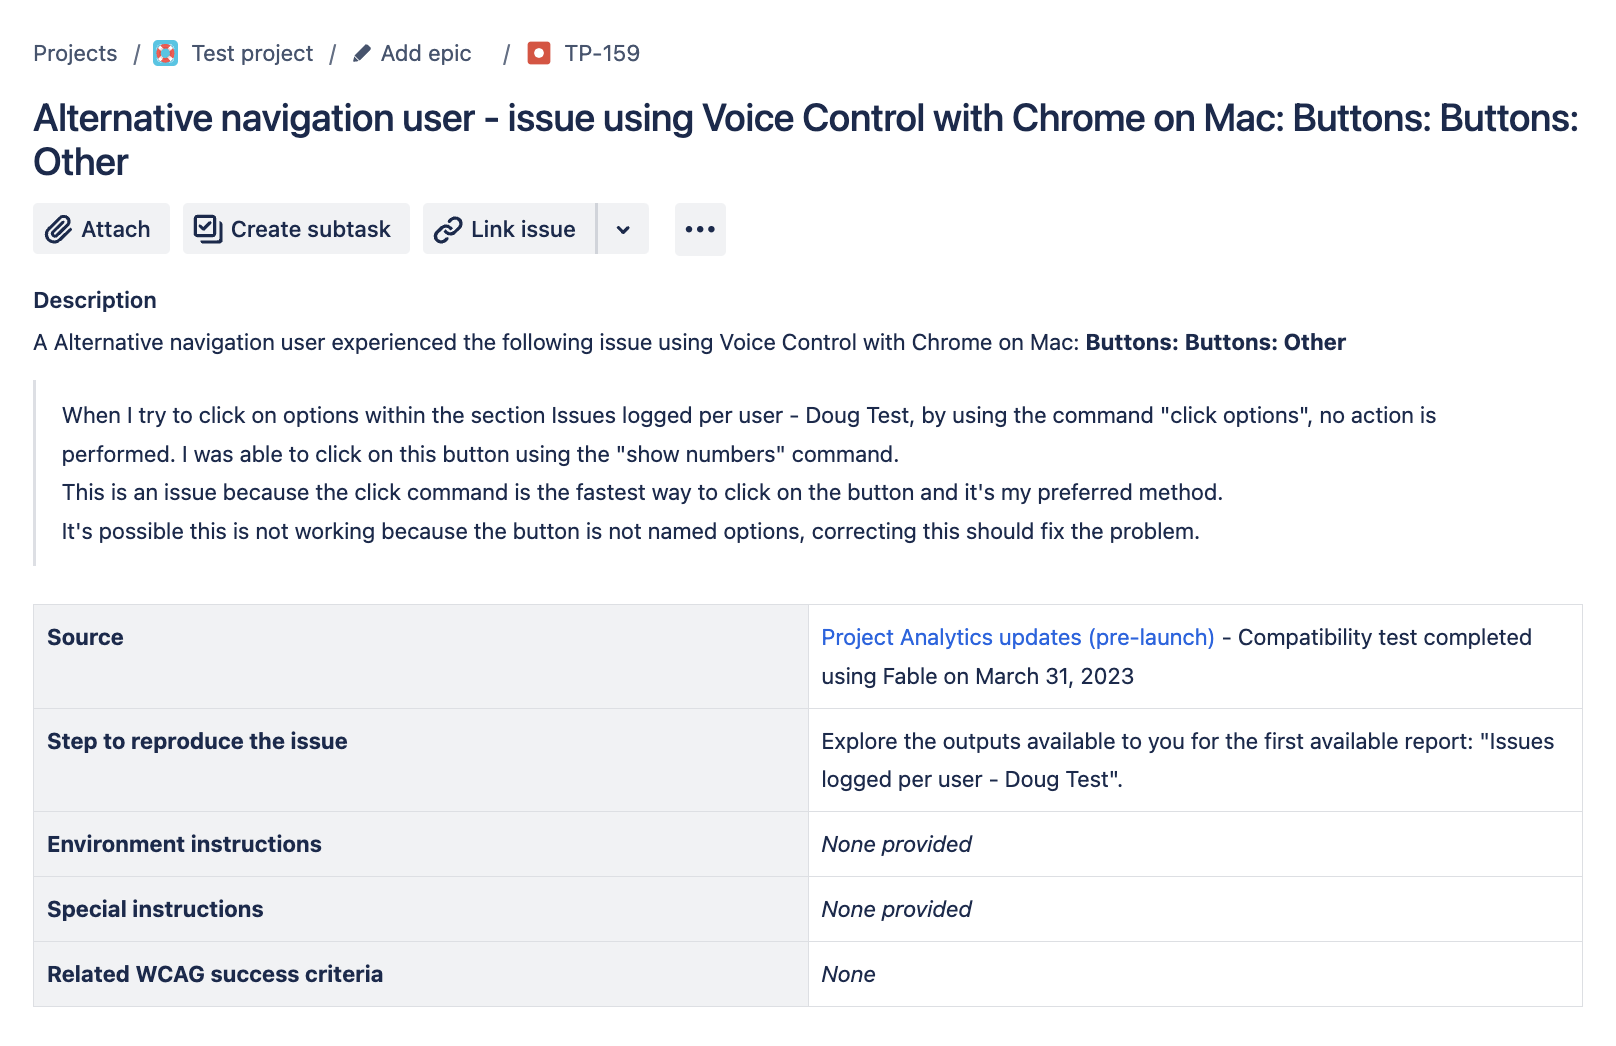
The Jira ticket will include the following details:
- Summary of assistive technology and configuration used
- For compatibility tests, issue a summary and provide feedback from the tester. For clips, clip name and description.
- Link to Compatibility Test or clip shared page
- Step the issue occurred on (if applicable)
- Any environment or special instructions included in the test (if applicable)
- Related WCAG criteria (if applicable)
- Labels “fable” and “accessibility”
- Any required fields for the selected issue type (inputted when creating the ticket in Fable)
Setup instructions
Step 1: Confirm requirements
- Your organization is using Jira cloud.
- You are a Fable Administrator.
- You have read & write access to the Jira projects you want to create tickets for.
If you do not have read & write access for the Jira projects you want to use, please contact your Jira Administrator.
Step 2: Integrate Jira
Once you have confirmed you meet the requirements you can begin setting up the integration. You can repeat steps 2 and 3 to integrate with multiple Jira sites.
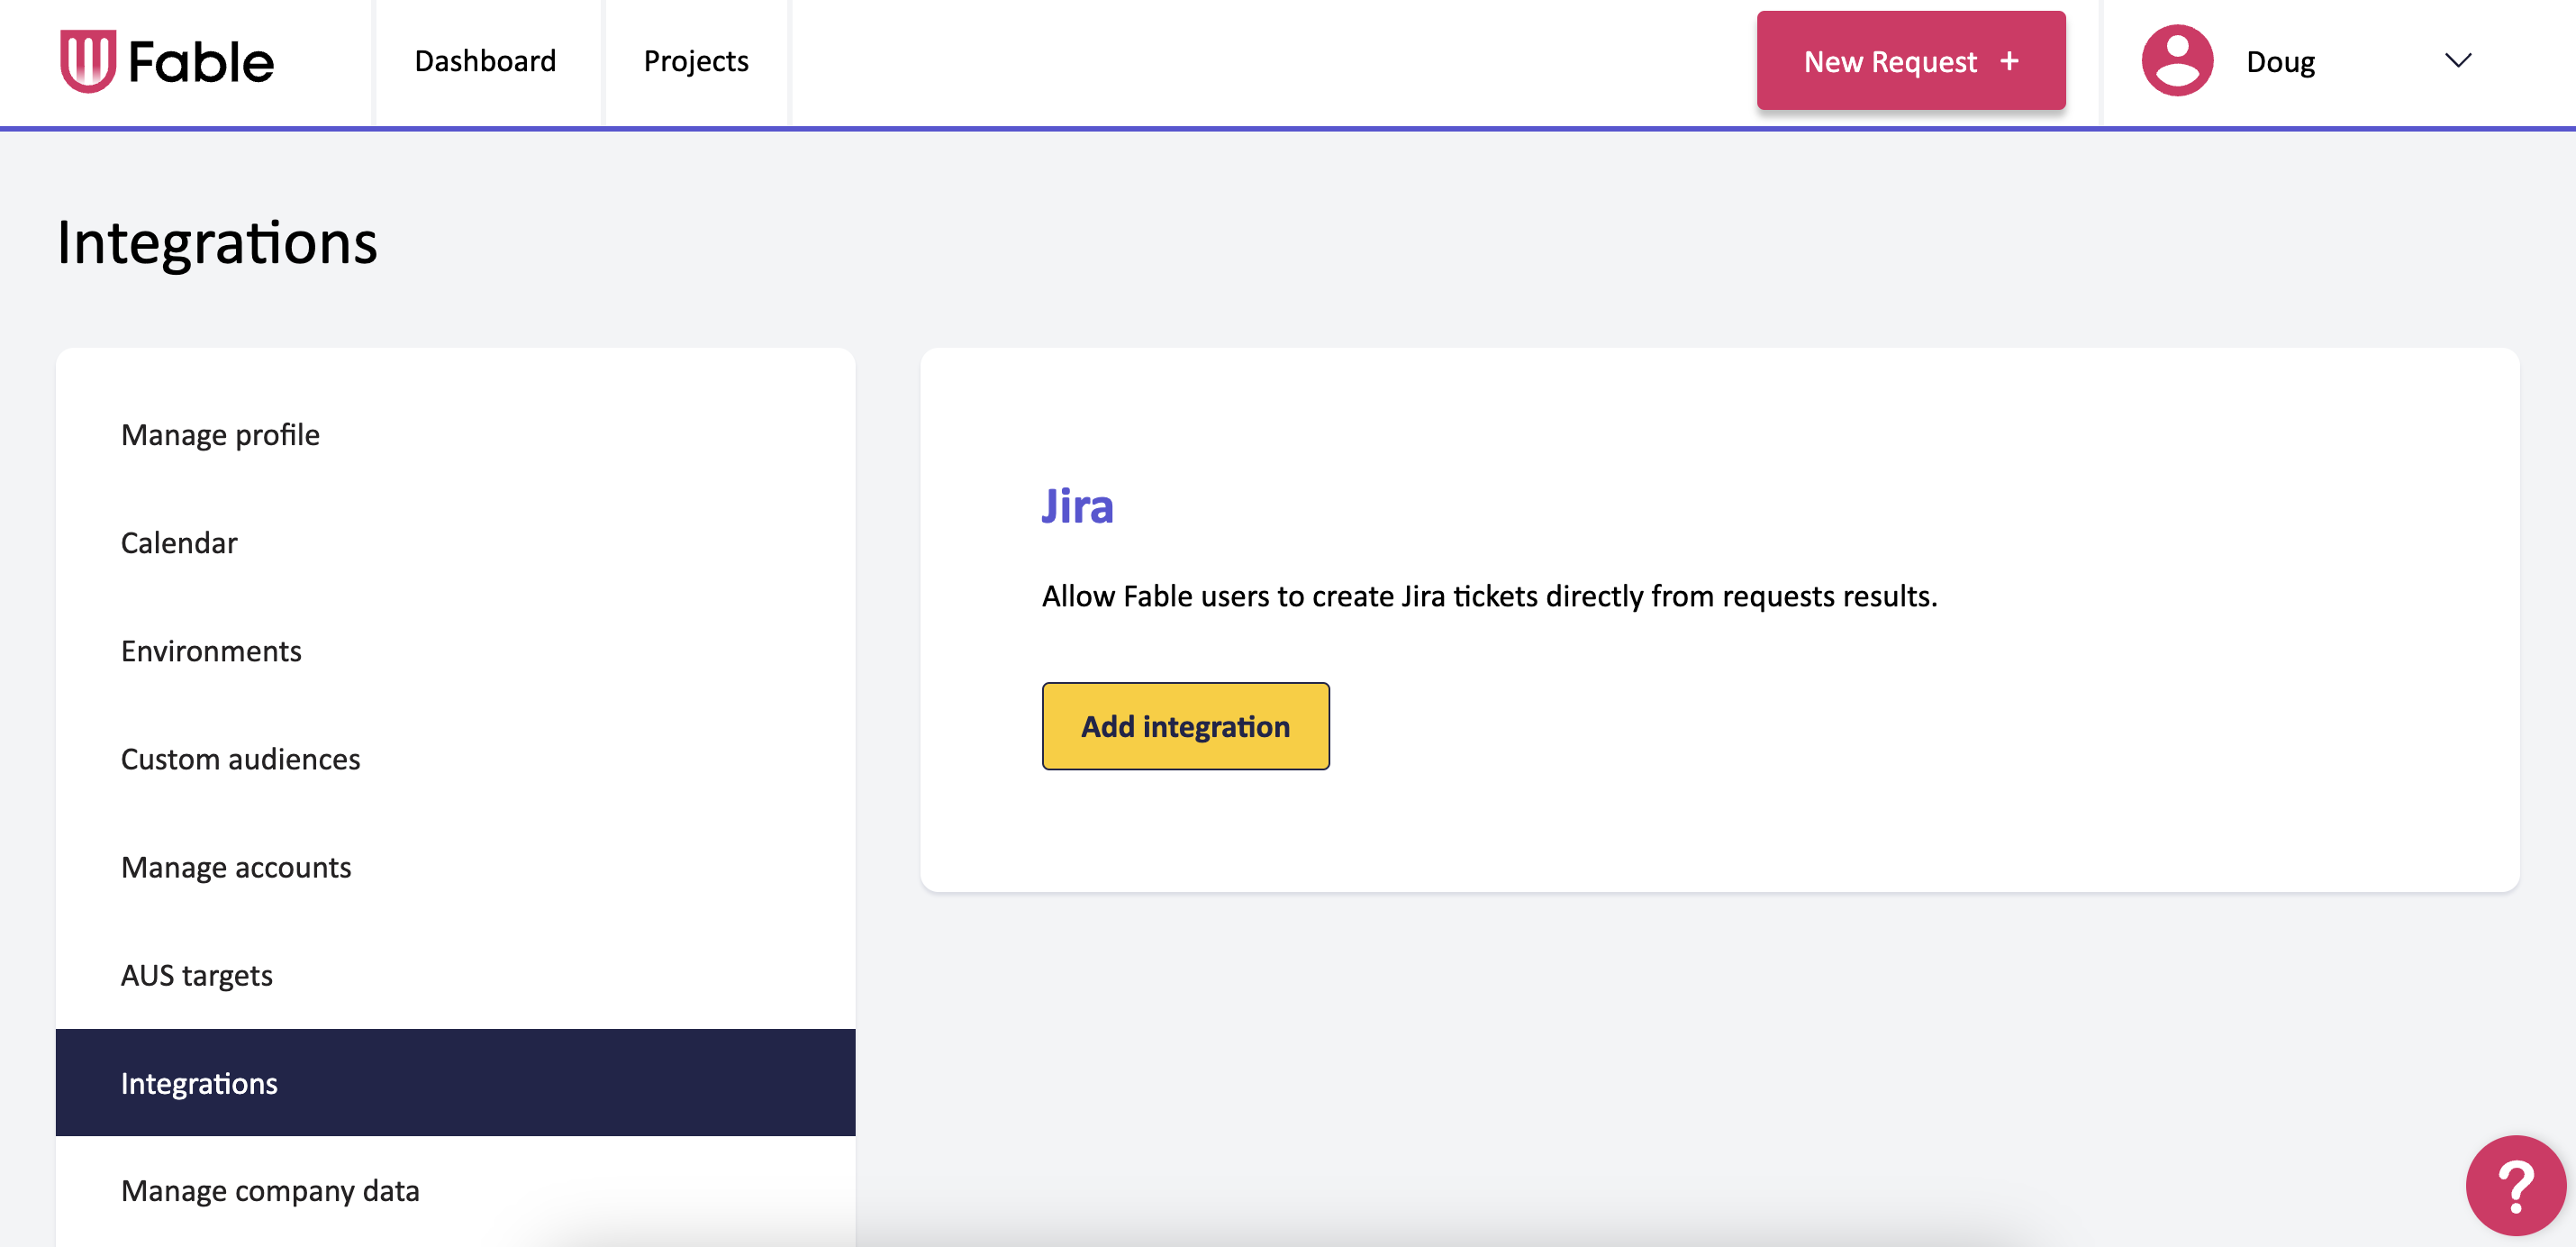
- Log in to Fable as the Company Admin.
- Select your username on the top right of the page.
- Select “Preferences” from the drop down.
- Select the “Integrations” menu option.
- Locate the Jira integration section and select “Add Integration”. You will be redirected to Jira/Atlassian.
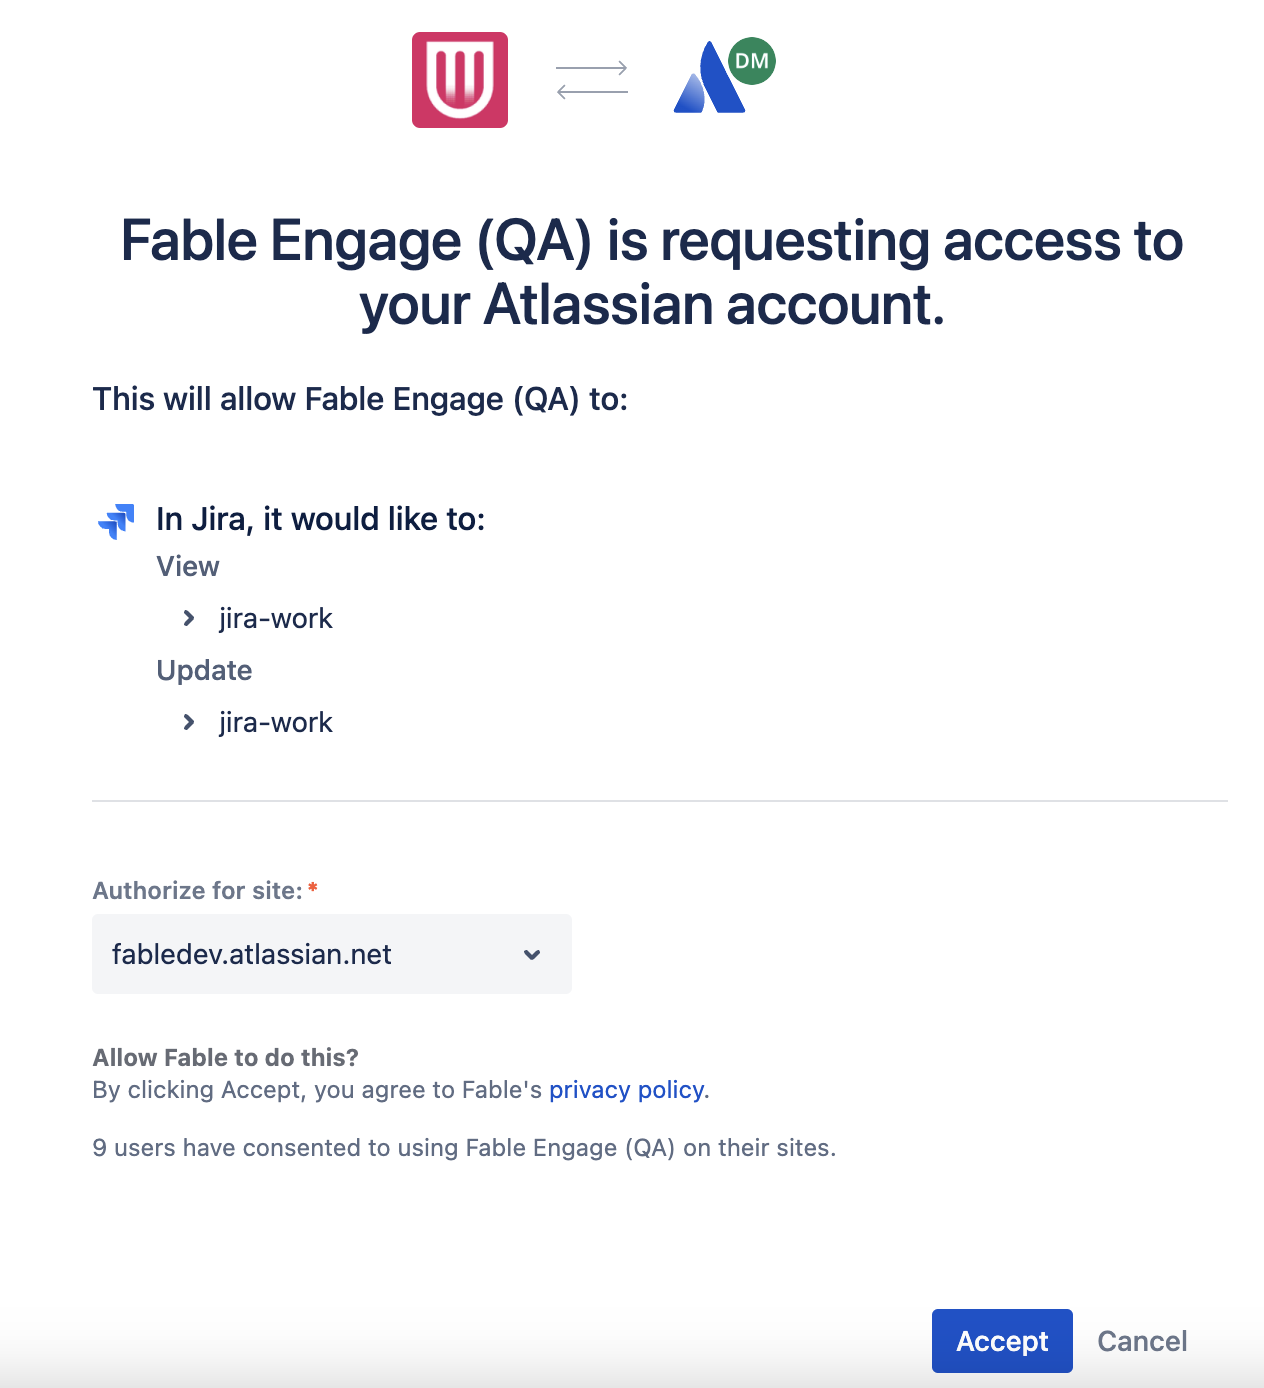
- Log in to your Jira account, if you’re not already logged in.
- Review the terms for using the Fable integration, and select the Jira site you want to integrate to.
- Select Accept. You will be redirected back to Fable.
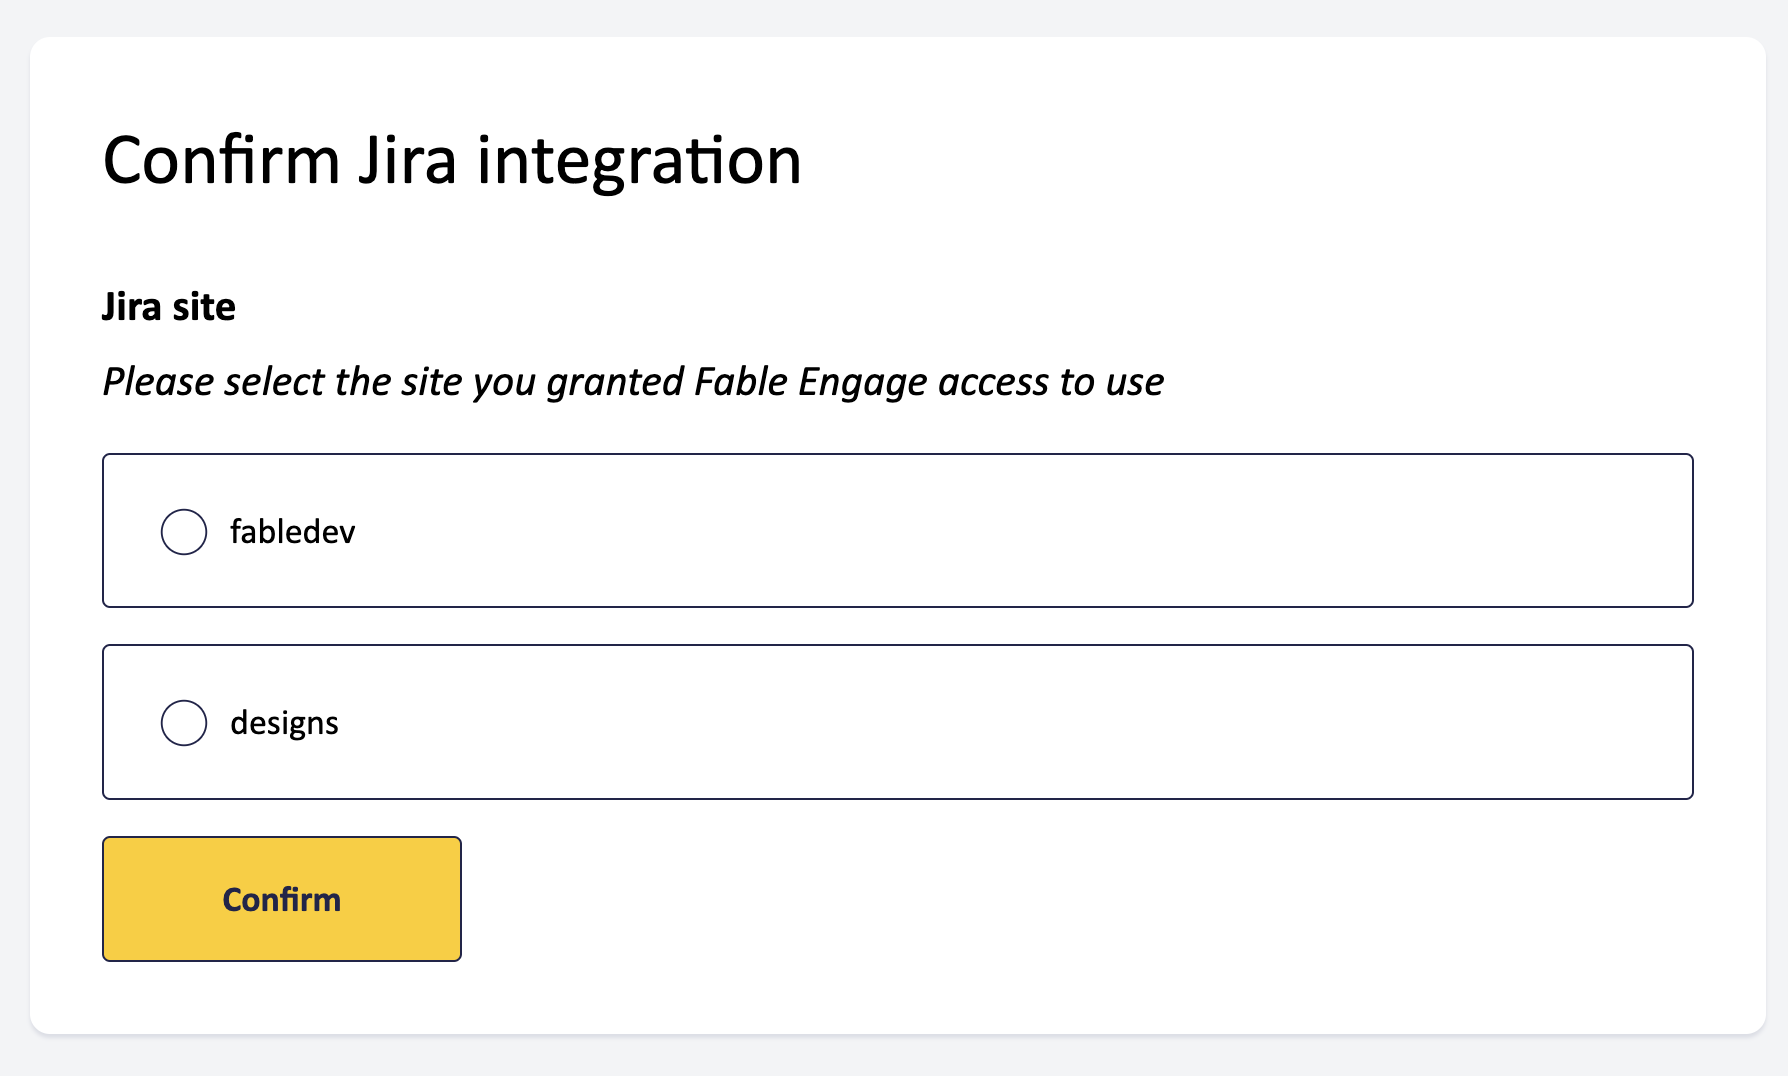
- Select the same Jira site you selected in Step 7 to confirm the integration. Note: if you only have one Jira site this step will be skipped.
You have now successfully integrated your Jira site to Fable.
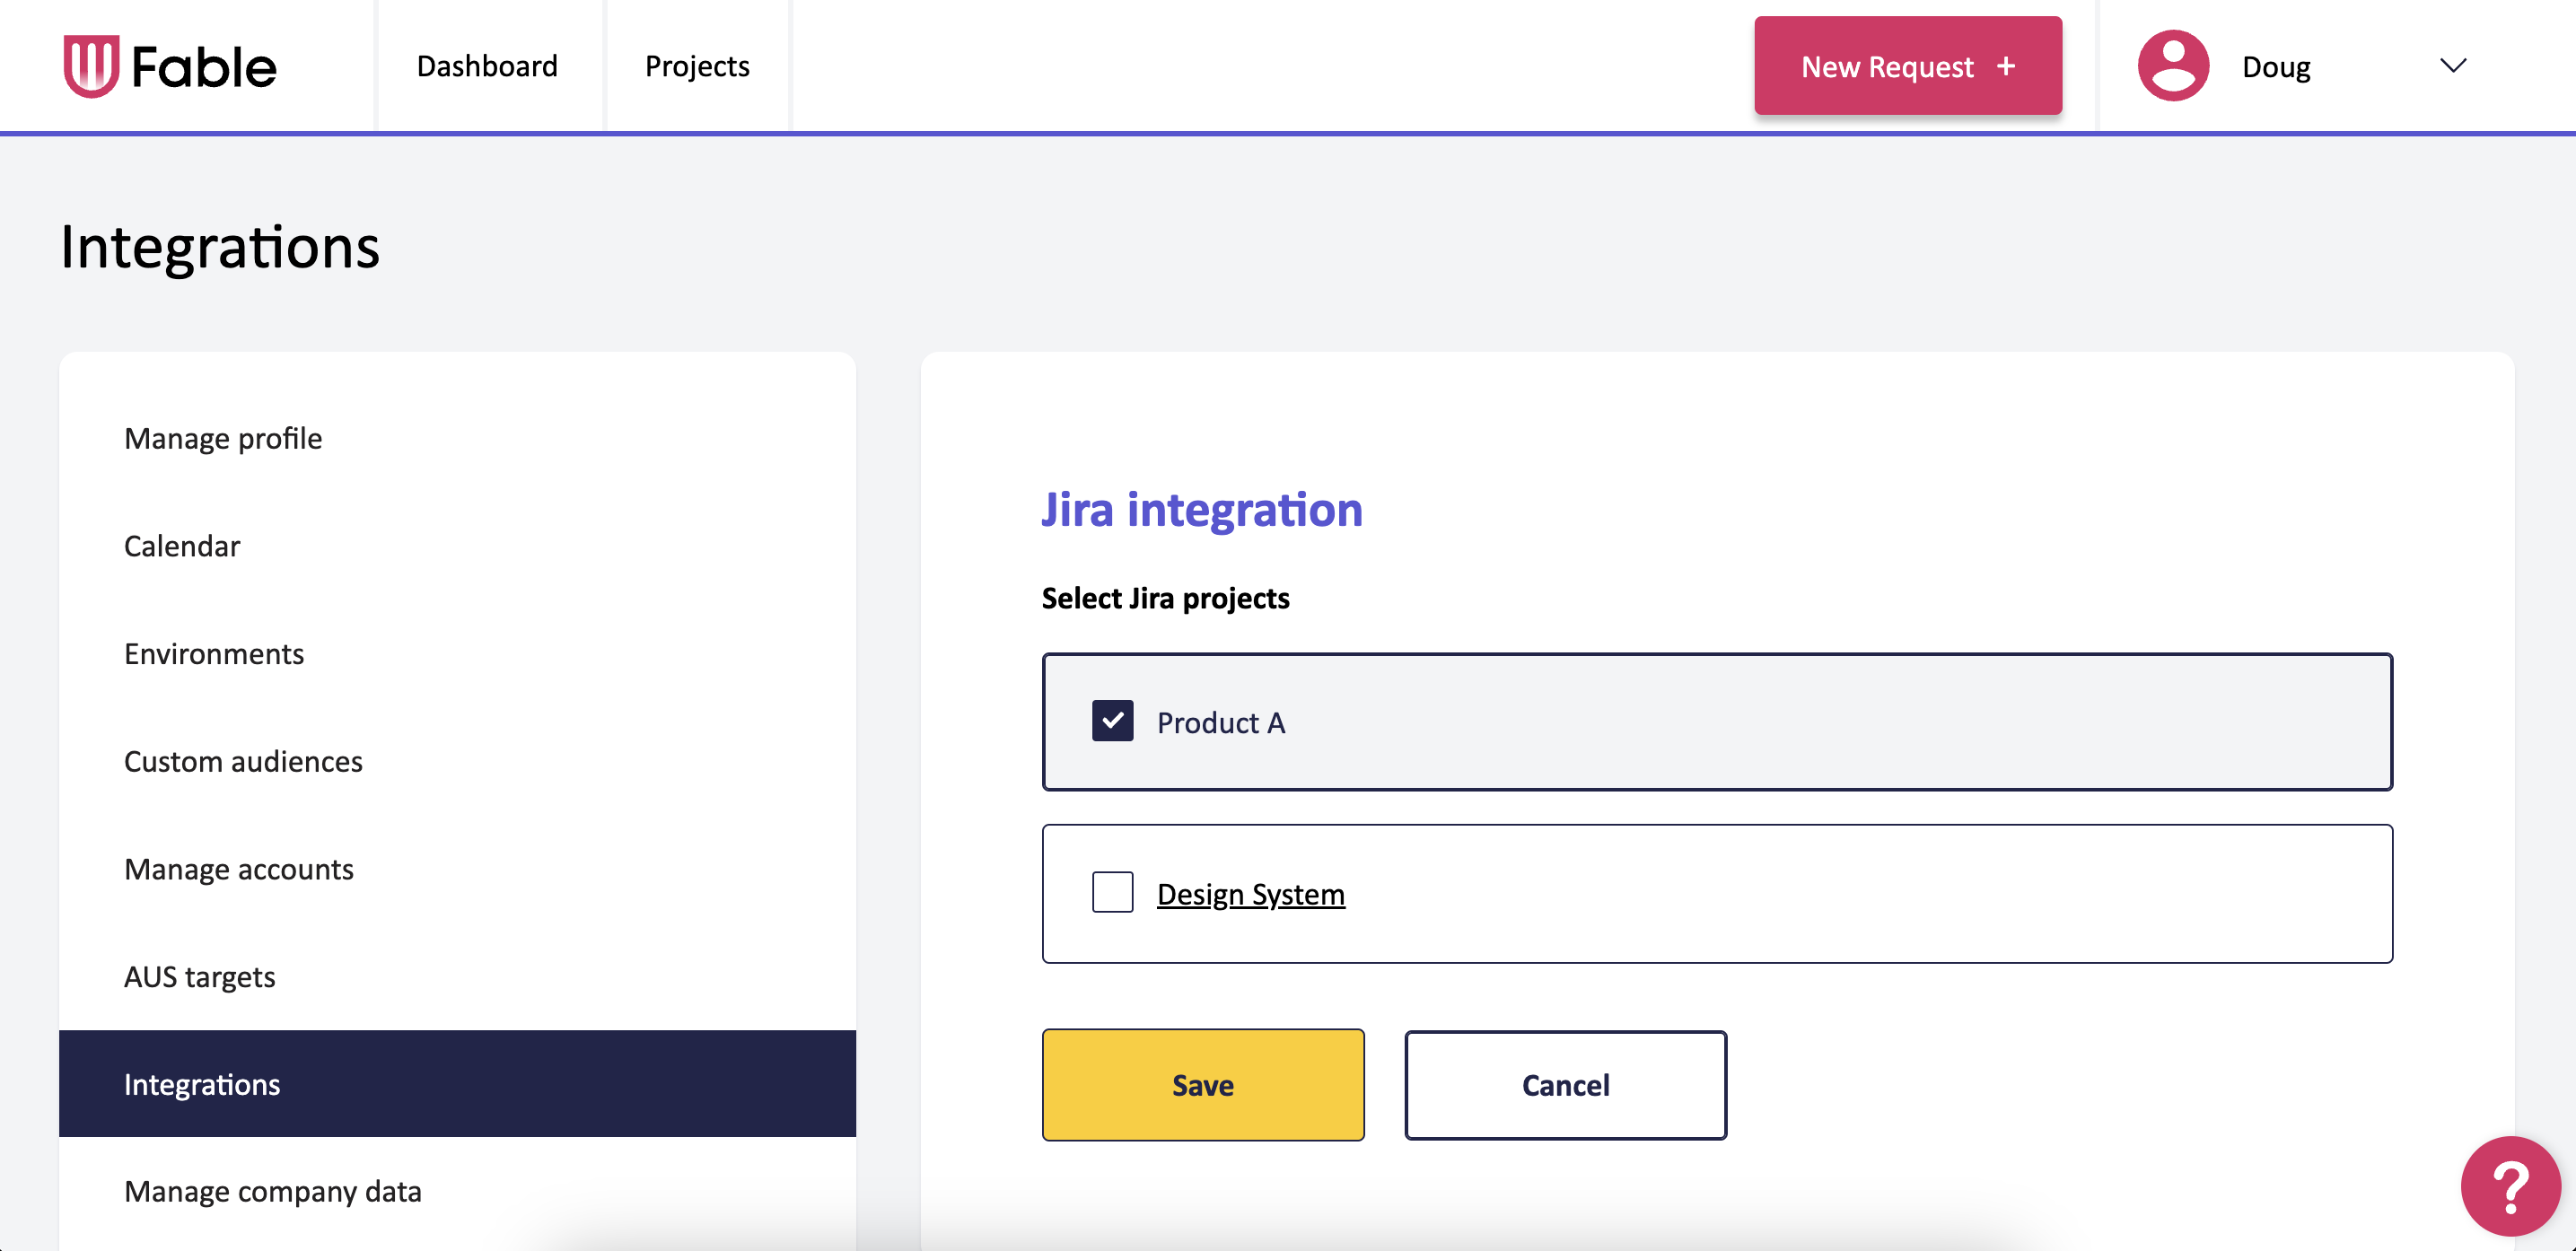
Step 3: Select Jira projects
Once Step 2 is complete, the page will be updated to reflect a successful integration. You must now select the Jira projects users can create tickets for within that site.
- Select “Edit Projects” for the Jira site.
- You will see the list of available Jira projects within the Jira site you set up in Step 2. Select all the projects you want to allow tickets to be created in. Note: you must select at least one project. If you do not select at least one project, Jira tickets cannot be created.
- Select “Save”.
Fable users will now be able to create ticket within the selected Jira projects. Repeat steps 2 and 3 to integrate with multiple Jira sites.
Frequently asked questions
Is the integration private and secure?
Yes, we store only the minimal amount needed for display and to create a hyperlink, but we can’t directly access any of it.
Can I use it to share video clips?
Yes, you can create a Jira ticket from the video clip directly.
Can I use this for my on-premises Jira setup?
No, the integration will only work if your organization is using Jira Cloud.
Troubleshooting and support
If you are unable to set up the integration, email support@makeitfable.com with the error message you are receiving and the step you are on.
If you are able to set up the integration but unable to create tickets, please delete the integrations and try again. During step 2, please ensure you select the same Jira site on tasks 7 and 9.
If you still encounter issues, email support@makeitfable.com and provide us with the following information
- Jira project name.
- Ticket type ID for the type of issue you are trying to use.
- Field configuration for the issue type you are trying to use, including which fields are required.
Have feedback for us?
We always love to hear from you! If you have thoughts on this feature, reach out to your Customer Success Manager or email support@makeitfable.com to share your feedback.
